> ## Documentation Index
> Fetch the complete documentation index at: https://docs.mailkick.app/llms.txt
> Use this file to discover all available pages before exploring further.
# Translation
> How to manage translators and translate your emails
## Overview
Mailkick lets you translate your emails into multiple languages while keeping everything in sync. Invite **translators** to your workspace — they get a focused editing experience where they can only change text content, without touching your design or layout.
## Adding a Translator
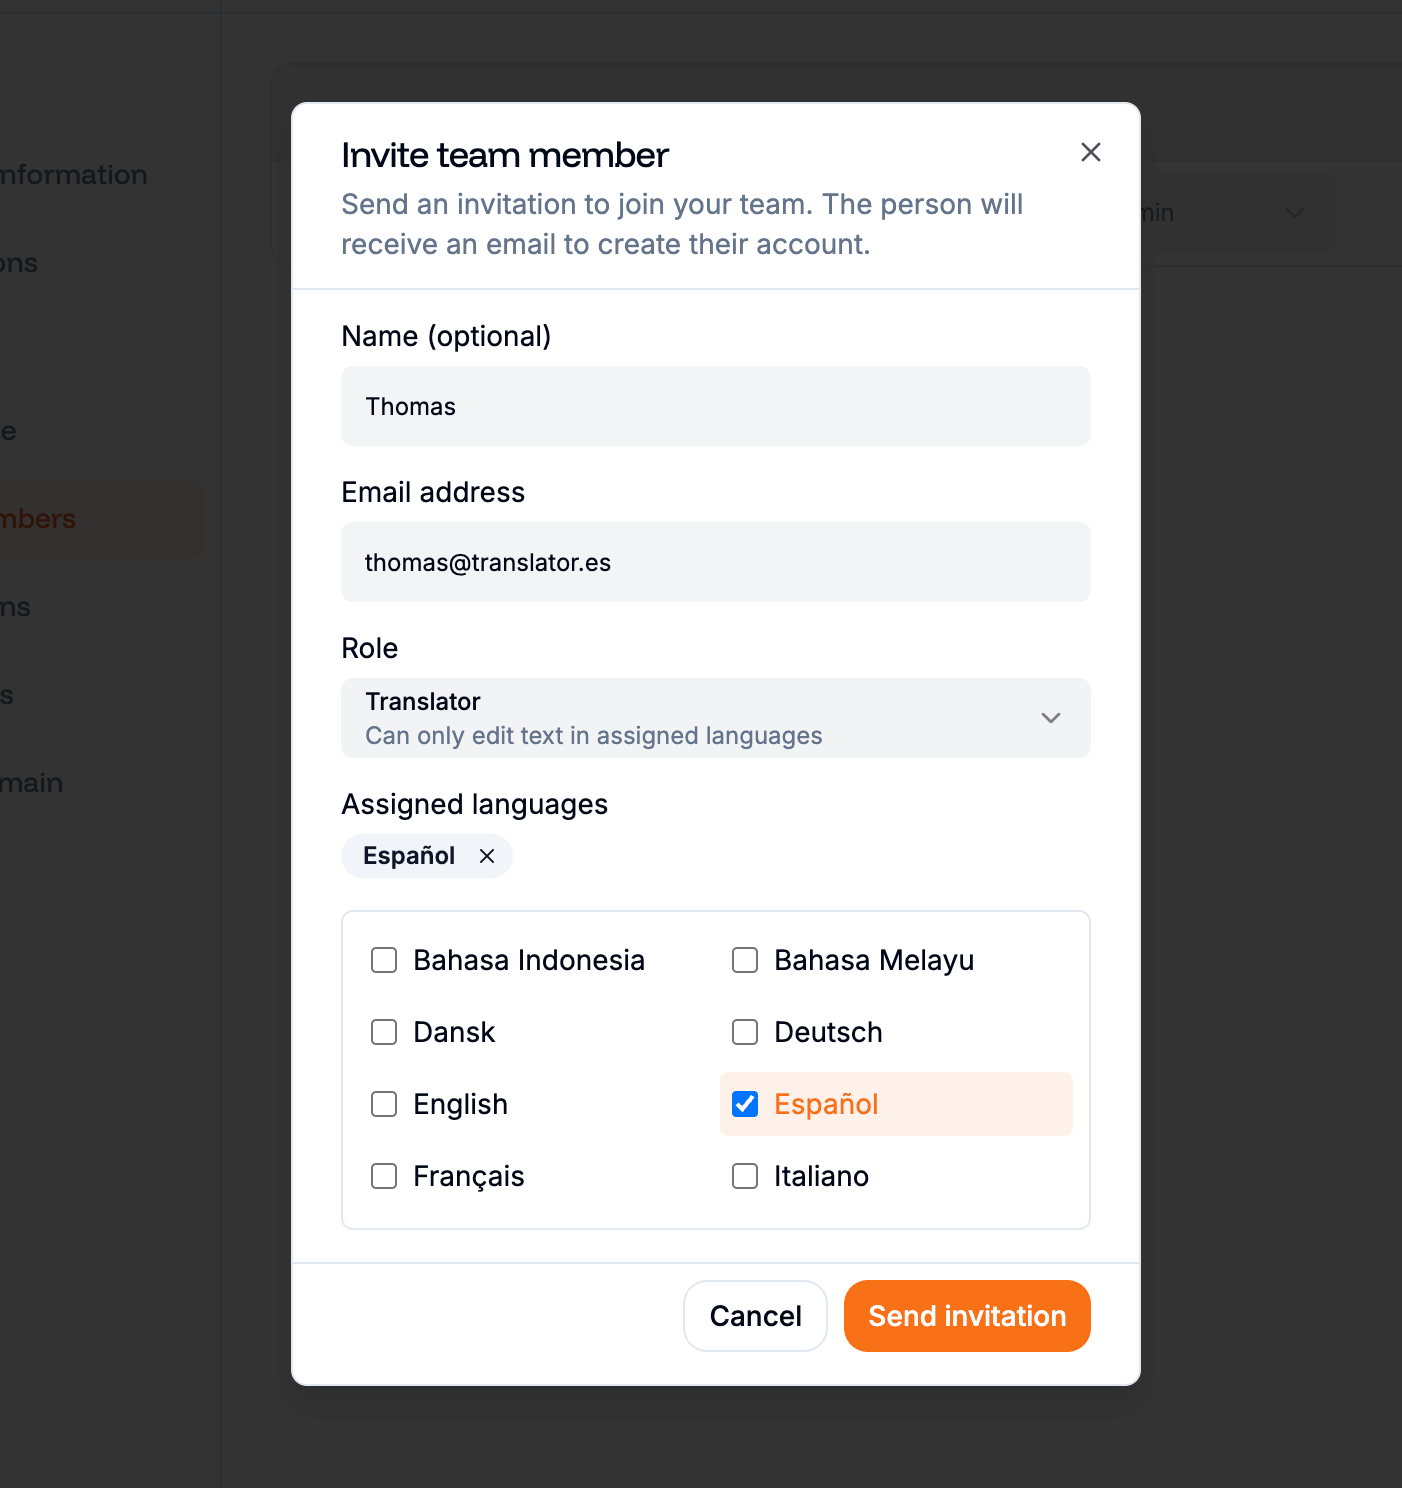 Go to **Settings → Team** in your workspace.
Click the **Invite Member** button to open the invitation modal.
Enter the translator's **name** and **email address**, then select the **Translator** role from the dropdown.
When you select the Translator role, a language selector appears. Pick the languages this translator is responsible for. You must assign at least one language.
Click **Send Invite**. The translator receives an email with a link to join your workspace.
### Managing languages after invitation
You can add or remove languages for any translator at any time. In **Settings → Team**, click the language badges next to their name — a popover opens with checkboxes to update their assigned languages instantly.
## What Can a Translator Access?
Translators have a **focused, restricted view** of your workspace. They only see what they need to translate — nothing more.
### What they see
Only emails matching their assigned languages. Other languages are hidden.
A simplified editor with only the canvas and a translation sidebar — no design panels, no element toolbar.
### What they don't see
| Section | Access |
| ----------------------------- | ------ |
| Emails in other languages | Hidden |
| Settings | Hidden |
| Image Library | Hidden |
| Style Library / Design System | Hidden |
| Component Library | Hidden |
## How Translation Works
When a translator opens an email, they get a streamlined editing experience designed for content work only.
### Editing content
* **Single click** on any text or button to start editing — no need to double-click
* The translation sidebar shows the email's **title**, **subject line**, and a list of all **images** with their alt text and links
* All text elements and button labels are editable directly on the canvas
Translators can edit: text content, button labels, image alt text, image links, email title, and subject line.
### What they can't change
Translators cannot modify the email structure or design:
* No drag-and-drop (elements stay where they are)
* No adding or deleting elements
* No style changes (colors, fonts, spacing, padding)
* No layout changes (columns, groups, order)
* **Localized components are locked** — components that have already been translated are read-only for translators. Only admins and members can edit the master component.
Go to **Settings → Team** in your workspace.
Click the **Invite Member** button to open the invitation modal.
Enter the translator's **name** and **email address**, then select the **Translator** role from the dropdown.
When you select the Translator role, a language selector appears. Pick the languages this translator is responsible for. You must assign at least one language.
Click **Send Invite**. The translator receives an email with a link to join your workspace.
### Managing languages after invitation
You can add or remove languages for any translator at any time. In **Settings → Team**, click the language badges next to their name — a popover opens with checkboxes to update their assigned languages instantly.
## What Can a Translator Access?
Translators have a **focused, restricted view** of your workspace. They only see what they need to translate — nothing more.
### What they see
Only emails matching their assigned languages. Other languages are hidden.
A simplified editor with only the canvas and a translation sidebar — no design panels, no element toolbar.
### What they don't see
| Section | Access |
| ----------------------------- | ------ |
| Emails in other languages | Hidden |
| Settings | Hidden |
| Image Library | Hidden |
| Style Library / Design System | Hidden |
| Component Library | Hidden |
## How Translation Works
When a translator opens an email, they get a streamlined editing experience designed for content work only.
### Editing content
* **Single click** on any text or button to start editing — no need to double-click
* The translation sidebar shows the email's **title**, **subject line**, and a list of all **images** with their alt text and links
* All text elements and button labels are editable directly on the canvas
Translators can edit: text content, button labels, image alt text, image links, email title, and subject line.
### What they can't change
Translators cannot modify the email structure or design:
* No drag-and-drop (elements stay where they are)
* No adding or deleting elements
* No style changes (colors, fonts, spacing, padding)
* No layout changes (columns, groups, order)
* **Localized components are locked** — components that have already been translated are read-only for translators. Only admins and members can edit the master component.
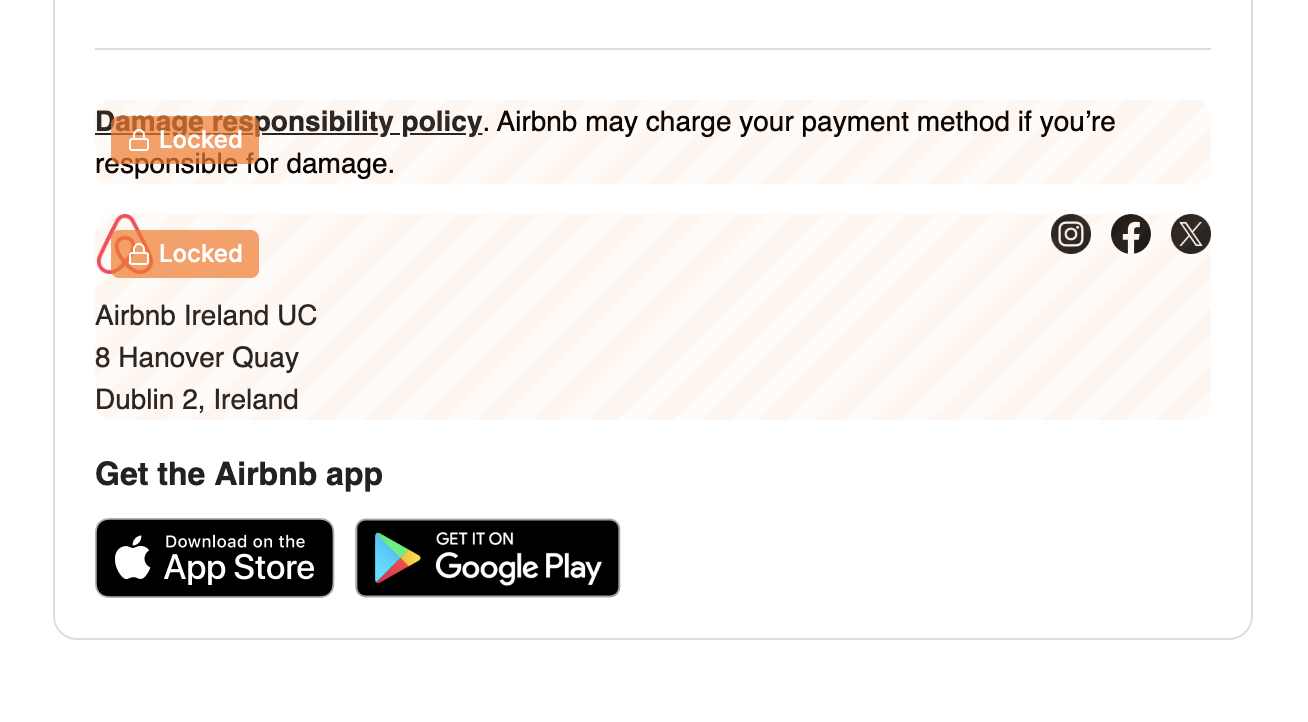 This means your design stays pixel-perfect across all languages. Translators focus on words, you keep control of the look.
### Translation groups
Emails in different languages can be linked together as a **translation group**. This makes it easy to see all versions of the same email side by side in the email list.
When an admin creates a translation from a master email (via the **Translate** action), the new copy is automatically linked to the original and assigned the target language.
## Validating Translations
Once a translator finishes their work, they can mark the email as **Ready** to signal it's done.
The translator reviews all text, button labels, subject line, and image alt texts in the editor.
From the email list, the translator changes the email status from **Draft** to **Ready**.
An admin or member can review the translation, leave comments if needed, and proceed to sync or send.
Use **comments** in the editor to communicate with translators. You can leave notes on specific elements to provide context or request changes.
## Quick Reference
| Role | See all emails | Edit design | Edit text | Manage team | Access settings |
| -------------- | ----------------------- | ----------- | --------- | ----------- | --------------- |
| **Owner** | Yes | Yes | Yes | Yes | Yes |
| **Admin** | Yes | Yes | Yes | Yes | Yes |
| **Member** | Yes | Yes | Yes | No | Limited |
| **Translator** | Assigned languages only | No | Yes | No | No |
This means your design stays pixel-perfect across all languages. Translators focus on words, you keep control of the look.
### Translation groups
Emails in different languages can be linked together as a **translation group**. This makes it easy to see all versions of the same email side by side in the email list.
When an admin creates a translation from a master email (via the **Translate** action), the new copy is automatically linked to the original and assigned the target language.
## Validating Translations
Once a translator finishes their work, they can mark the email as **Ready** to signal it's done.
The translator reviews all text, button labels, subject line, and image alt texts in the editor.
From the email list, the translator changes the email status from **Draft** to **Ready**.
An admin or member can review the translation, leave comments if needed, and proceed to sync or send.
Use **comments** in the editor to communicate with translators. You can leave notes on specific elements to provide context or request changes.
## Quick Reference
| Role | See all emails | Edit design | Edit text | Manage team | Access settings |
| -------------- | ----------------------- | ----------- | --------- | ----------- | --------------- |
| **Owner** | Yes | Yes | Yes | Yes | Yes |
| **Admin** | Yes | Yes | Yes | Yes | Yes |
| **Member** | Yes | Yes | Yes | No | Limited |
| **Translator** | Assigned languages only | No | Yes | No | No |