Overview
Mailkick lets you translate your emails into multiple languages while keeping everything in sync. Invite translators to your workspace — they get a focused editing experience where they can only change text content, without touching your design or layout.Adding a Translator
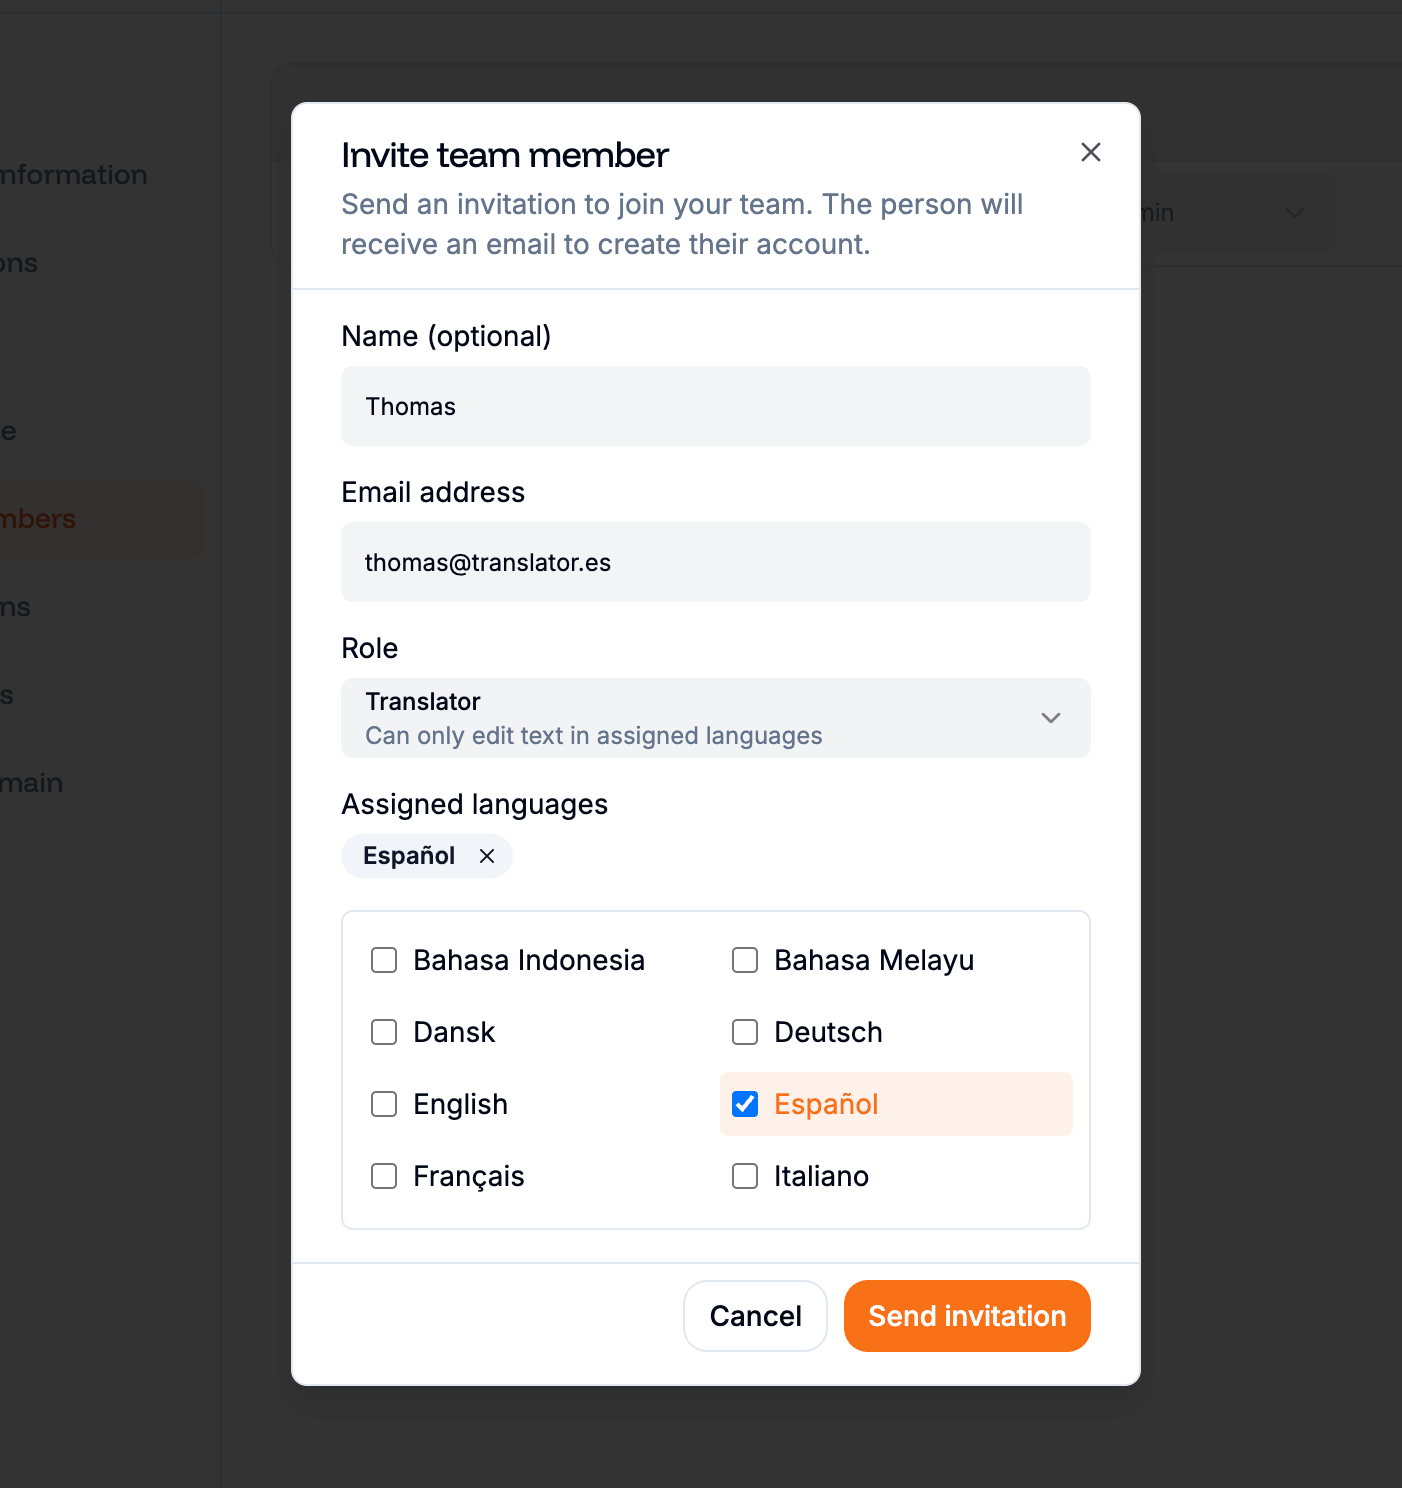
Fill in the details
Enter the translator’s name and email address, then select the Translator role from the dropdown.
Assign languages
When you select the Translator role, a language selector appears. Pick the languages this translator is responsible for. You must assign at least one language.
Managing languages after invitation
You can add or remove languages for any translator at any time. In Settings → Team, click the language badges next to their name — a popover opens with checkboxes to update their assigned languages instantly.What Can a Translator Access?
Translators have a focused, restricted view of your workspace. They only see what they need to translate — nothing more.What they see
Email list
Only emails matching their assigned languages. Other languages are hidden.
Email editor
A simplified editor with only the canvas and a translation sidebar — no design panels, no element toolbar.
What they don’t see
| Section | Access |
|---|---|
| Emails in other languages | Hidden |
| Settings | Hidden |
| Image Library | Hidden |
| Style Library / Design System | Hidden |
| Component Library | Hidden |
How Translation Works
When a translator opens an email, they get a streamlined editing experience designed for content work only.Editing content
- Single click on any text or button to start editing — no need to double-click
- The translation sidebar shows the email’s title, subject line, and a list of all images with their alt text and links
- All text elements and button labels are editable directly on the canvas
Translators can edit: text content, button labels, image alt text, image links, email title, and subject line.
What they can’t change
Translators cannot modify the email structure or design:- No drag-and-drop (elements stay where they are)
- No adding or deleting elements
- No style changes (colors, fonts, spacing, padding)
- No layout changes (columns, groups, order)
- Localized components are locked — components that have already been translated are read-only for translators. Only admins and members can edit the master component.
Translation groups
Emails in different languages can be linked together as a translation group. This makes it easy to see all versions of the same email side by side in the email list. When an admin creates a translation from a master email (via the Translate action), the new copy is automatically linked to the original and assigned the target language.Validating Translations
Once a translator finishes their work, they can mark the email as Ready to signal it’s done.Review content
The translator reviews all text, button labels, subject line, and image alt texts in the editor.
Set status to Ready
From the email list, the translator changes the email status from Draft to Ready.
Use comments in the editor to communicate with translators. You can leave notes on specific elements to provide context or request changes.
Quick Reference
| Role | See all emails | Edit design | Edit text | Manage team | Access settings |
|---|---|---|---|---|---|
| Owner | Yes | Yes | Yes | Yes | Yes |
| Admin | Yes | Yes | Yes | Yes | Yes |
| Member | Yes | Yes | Yes | No | Limited |
| Translator | Assigned languages only | No | Yes | No | No |